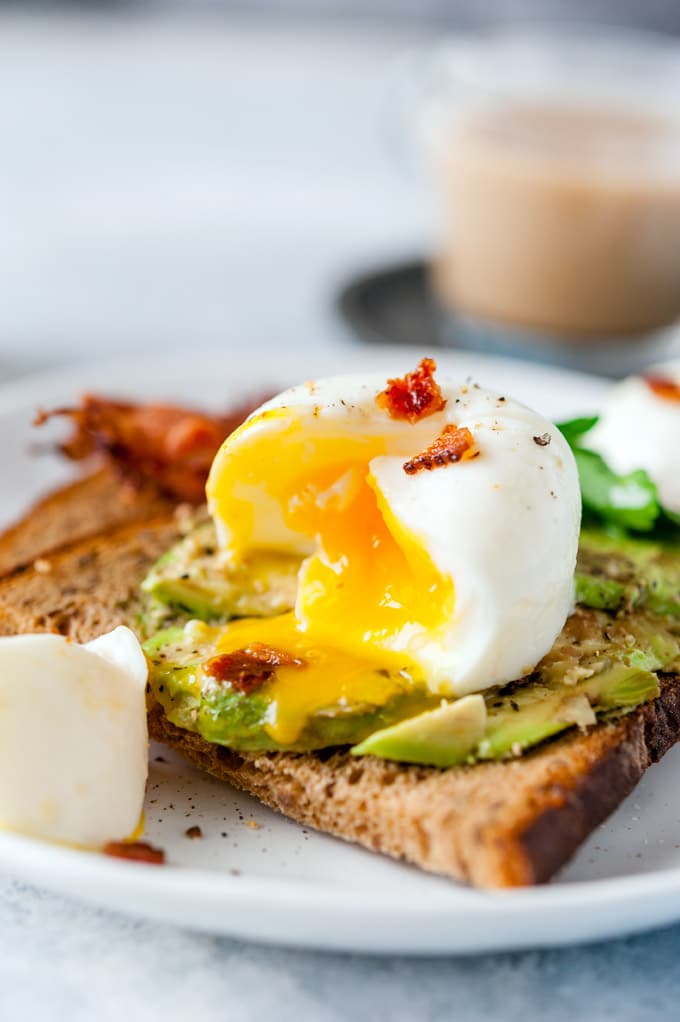
Poaching
When you want to gently cook delicate foods without adding other flavors, poaching can be the way to go. But what is poaching?
Properties of Poaching
Poaching is a moist heat method of cooking – that is, heat is transferred through liquid (water) to cook the item. It differs from boiling in that the water stays at a simmer. This lower heat helps maintain the texture and tenderness of food. There are two types of poaching: shallow and deep. No mystery here: in shallow poaching, a bed of aromatics (onions, carrots, celery, herbs etc) is used to keep the food off the bottom of the pot, and then liquid is added to partially cover. In deep poaching, the food is completely submerged.
For neutral food, like the base of a chicken salad, you might want to use water to poach, but a better choice is a flavorful liquid like a court bouillon (water, an acid such as lemon juice or wine, and aromatics) or stock. The liquid absorbs a lot of flavor from the food, so many cooks will reduce the liquid from shallow poaching into a scrumptious sauce.
Poaching is often considered a healthy way to cook food because it doesn’t add fat, as cooking in oil or butter would. A high-tech variant on poaching is sous-vide, a method of cooking where the food is vacuum-sealed inside a plastic bag and then cooked in a water circulator. This provides gentle, even cooking.
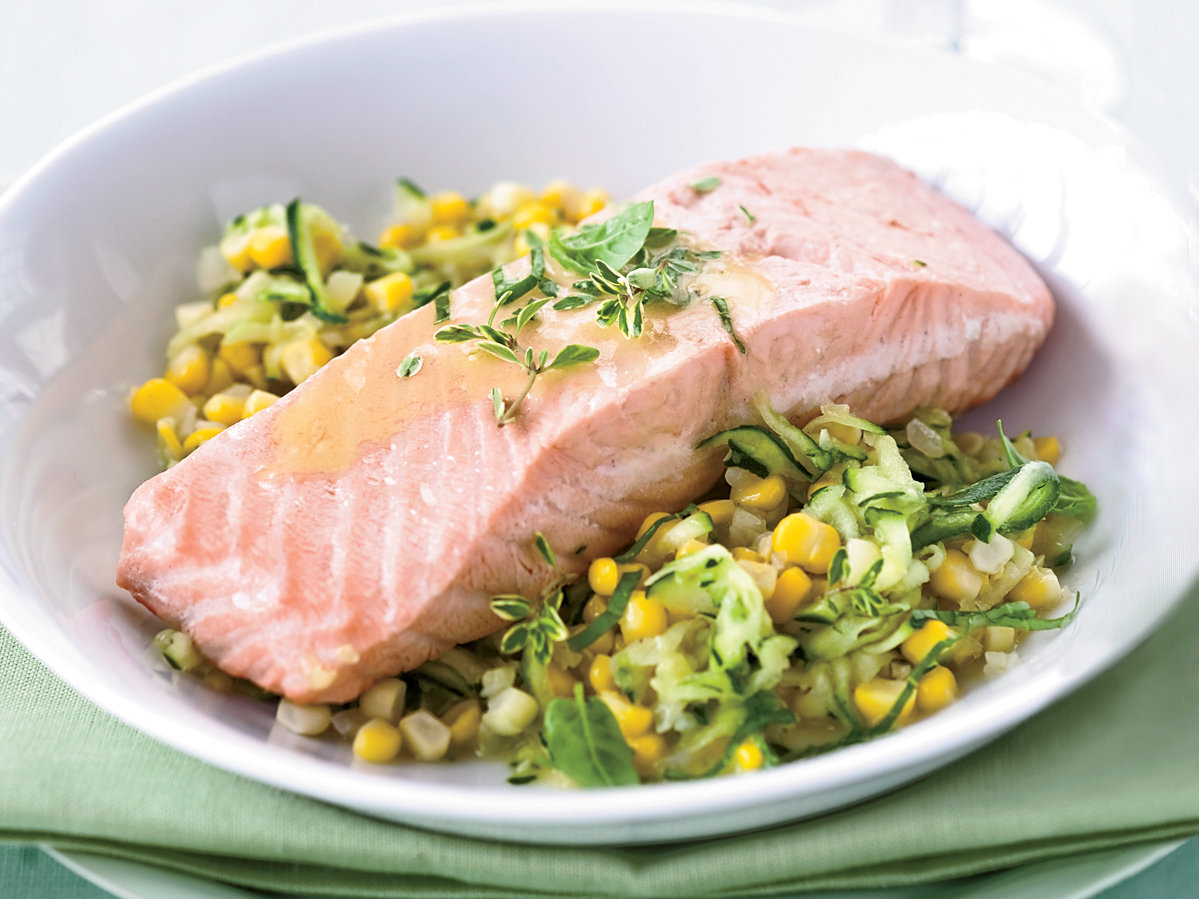
Poached Salmon
1/2 cup dry white wine
1/2 cup water
2 pounds salmon fillets, cut into 4 pieces
2 tablespoons butter, softened
1 1/2 teaspoons dried parsley
1 1/2 teaspoons chopped garlic
salt and pepper to taste
Heat wine and water over medium high heat in a large non-stick skillet for 5 minutes. Slide salmon pieces into poaching liquid and dot with butter. Sprinkle with dried parsley, garlic, salt and pepper. Bring to a slow boil, reduce heat to medium and poach until salmon flesh is firm, about 10 to 15 minutes.
Pick a Peck of Peppers!
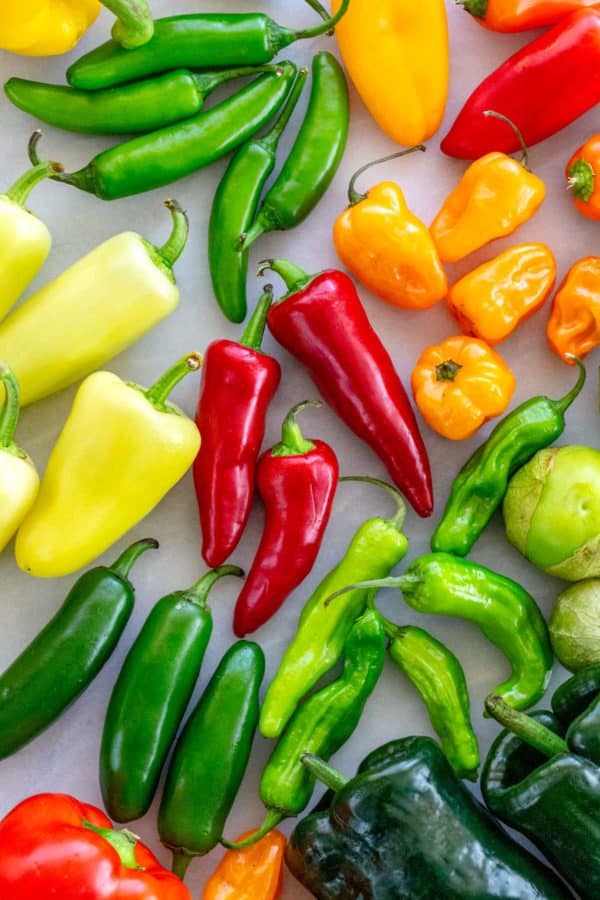
It’s really true: spicy food can help keep you cool in the heat. It causes you to sweat, which cools down your skin. So let’s take a look at hot peppers and using them in your kitchen.
The chili pepper originated in Mexico and spread across the New World, a flavorful staple in its cuisine long before Europeans landed. The explorers took the riches of this culinary discovery back to the Old World. Portuguese traders carried the chili to Asia, where it became an integral part of the cuisine of many Asian countries. Now China and India are among some of the biggest producers in the world. You might have heard of the Scoville Scale, which rates the heat of peppers. It has been replaced by a more scientific system which measures the heat-producing chemicals in the pepper, known as High Performance Liquid Chromatography (HPLC). That chemical is capsaicin. Whichever way you measure it, peppers range from mild varieties such as Anaheim peppers and poblanos, to hotter varieties such as the Scotch bonnet, Thai bird’s eye, and ghost pepper.
Want to control the heat in your recipe? Keep in mind that within a variety, smaller peppers are usually hotter. Big, fat poblanos are great for stuffed peppers because they won’t be as spicy as the smaller poblanos you cut up for salsa. Remove the seeds and veins to tame the heat, or leave them in if you prefer the burn. (The capsaicin in peppers is actually found in the veins, not the seeds; the seeds pick up the heat from proximity.) For soups, marinades and other liquid-based dishes, you can also put the pepper in whole to impart some of the flavor without having pieces of pepper in your dish … just make sure you pull it out before you eat! Handle all but the mildest peppers with care. For particularly spicy peppers, such as serranos, you may want to wear gloves while chopping and handling. Regardless, clean your hands and your cutting board thoroughly after working with peppers. Avoid touching your hands or wiping them on towels. It’s easy to transfer a bit of capsaicin to another surface.
Bitten off more than you can chew? Don’t reach for water: capsaicin is an oil, and just like the old saying, it won’t mix. Instead, pour yourself a glass of milk. The protein in milk, casein, is a fat that acts on capsaicin in a manner similar to detergent, breaking up the molecules.
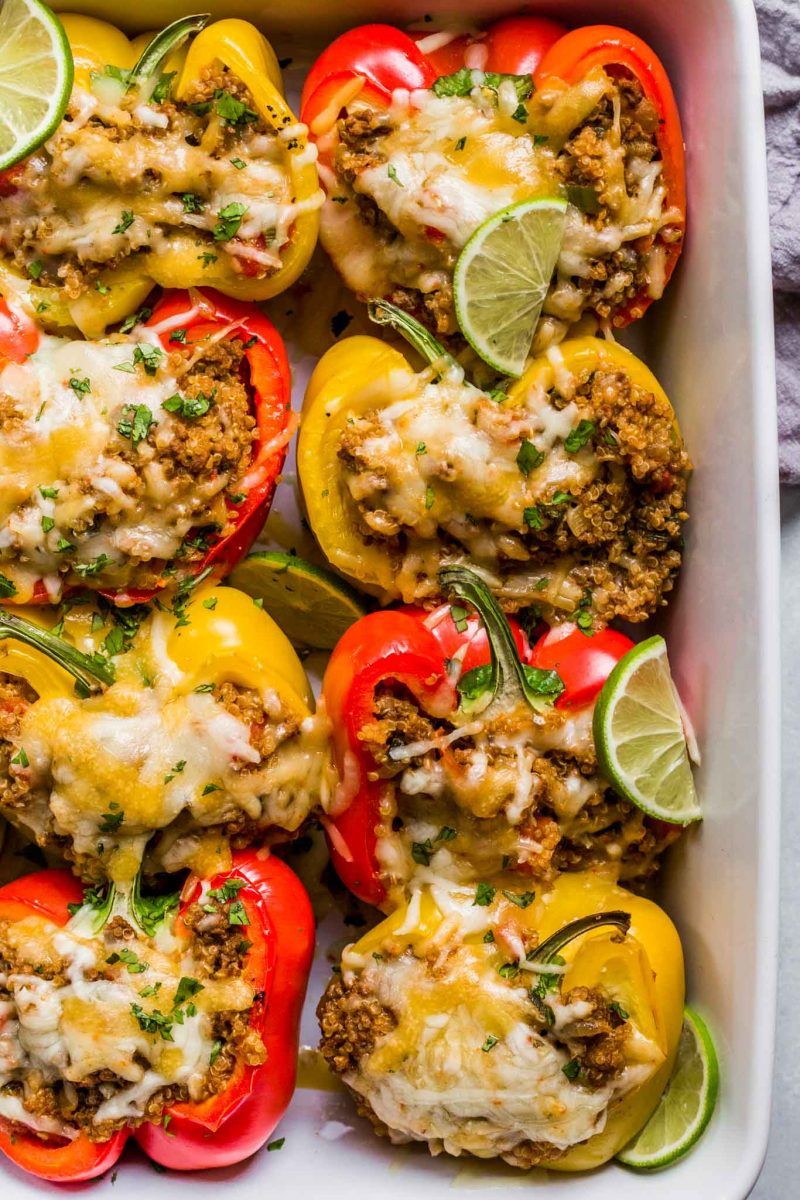
Southwest Stuffed Peppers
4 poblano peppers halved and seeds/membranes removed
1 pound lean ground beef OR chorizo
1 teaspoon each ground cumin, chili powder, garlic powder
1 cup cooked long grain white rice
1/2 cup canned black beans, drained
1/2 cup frozen or canned corn (drained)
1 15-ounce can diced tomatoes, drained
1 4-ounce can diced green chiles
1/2-1 cup grated mozzarella OR Mexican-blend cheese
Preheat oven to 350 degrees and lightly grease a large baking sheet. Arrange halved poblano peppers in a single layer on the baking sheet so that they aren’t overlapping. Bake for 10-15 minutes while you move on to the next step. Add ground beef (or preferred meat choice) and rice to a large skillet, and season with the cumin, chili powder, and garlic powder. Saute over medium heat for 5-8 minutes until meat is browned and cooked through. Stir in the black beans, corn, diced tomatoes, and green chiles. Cook another 1-2 minutes. Spoon mixture into the peppers, sprinkle with cheese, and return to oven for another 10 minutes or so until peppers are tender and cheese is melted. Allow to cool slightly before serving.
Flip it Around!

Having trouble cooking your favorite foods? Let’s turn it around!
If you have a conventional oven, it probably has hot spots and cool spots – places that cook more quickly or slowly. For casseroles or large roasts that are slow-cooked for hours, this doesn’t make much difference, but for other dishes, such as roasting potato wedges or baking cookies, you may find that the food on one side is cooked through while the other side is mushy … or almost raw. Turn your pan around halfway through for even cooking.
If you make bread in a loaf pan, did you know the best way to cool it is on its side? Think about bread in a pan: it expands upwards, which means that this is the weakest part of its structure. Turning the loaf on its side (once removed from the pan, of course) puts gravity on its side.
When rolling out dough with a rolling pin, periodically lift it and give it a quarter turn. This helps in two ways. First, since we’re all right or left handed, we roll harder on one side, making the dough thinner on that side. Two, that little lift will give you an early warning if you need more flour underneath. There’s nothing worse than rolling out a huge cookie sheet, pushing your cutter in … and everything sticks.
Finally, when cooking meat, be sure to sear it on all sides. With thin pieces of meat such as chicken breasts or steaks, this usually means top and bottom, but when working with big roasts for braises, you might want to turn it on the other sides, too. Start with the “presentation side” – this is a fancy culinary term for “face up.” Since your oil is clean and free of debris when you begin cooking, starting with the presentation side gives you the prettiest golden glow for when it hits the plate.

Lemon Poppy Seed Bread
1 1/2 cups (195 grams) all-purpose flour
1 teaspoon baking powder
1/4 teaspoon salt
1 tablespoon grated lemon zest (outer yellow skin of one lemon)
2 1/2 tablespoons poppy seeds
3/4 cup (170 grams) unsalted butter, room temperature
3/4 cup (150 grams) granulated white sugar
3 large eggs
1 teaspoon pure vanilla extract
1/4 cup (60 ml) milk
Lemon Glaze:
3 tablespoons freshly squeezed lemon juice
1/4 cup (50 grams) granulated white sugar
Preheat oven to 350 degrees F (180 degrees C) and place the oven rack in the center of the oven. Butter and flour, or spray with a non stick vegetable/flour spray, the bottom and sides of a loaf pan (8 x 4 x 2 1/2 inch) (20 x 10 x 7 cm). Line the bottom of the pan with a piece of parchment or wax paper.
In a separate bowl, whisk together the flour, baking powder, salt, lemon zest, and poppy seeds. In the bowl of your electric mixer, or with a hand mixer, beat the butter until softened (about 1-2 minutes). Add the sugar and continue to beat until light and fluffy (2-3 minutes). Add the eggs, one at a time, beating well after each addition. Scrape down the sides of the bowl as needed. Beat in the vanilla extract. With the mixer on low, add the flour mixture (in three additions) and milk (in two additions) alternately, starting and ending with the flour. Mix only until combined. Scrape the batter into the prepared pan, smoothing the top with the back of a spoon or an offset spatula. Bake for about 50 to 60 minutes, or until the bread is golden brown and a toothpick inserted in the center comes out clean.
Meanwhile, in a small microwaveable bowl, stir the sugar with the lemon juice. Place in the microwave for about 20-30 seconds or just until sugar has dissolved. (Alternately, you can heat the ingredients together in a small saucepan on the stove.)
When the bread is done, remove from oven and place on a wire rack. Immediately brush the top of the bread with the hot lemon glaze. Cool the loaf in the pan for about 20-30 minutes then remove from pan and let cool completely on a wire rack. This bread is best when stored overnight to allow the glaze to be absorbed into the bread and to allow the flavors to mingle.
As American As…

American Inventions
Rich, chocolaty, chewy fudge is an American invention, concocted in 1888 by Emelyn Hartridge, a student at Vassar College. It spread to the other Seven Sisters colleges, and was so popular that professors denounced it as dangerous to female education. Too much time melting chocolate in their dorm rooms and not enough time studying books!
What could be more American than coating a hot dog in batter and frying it? No one can agree upon which state fair produced the classic corn dog, but there’s no doubt it was born here.
Pecan nuts are native to North America, and of course, bakers had to put them into pies.
Just after the turn of the century (the 1900s), S’mores started as a dainty snack known as the Marshmallow Marguerite. Top a saltine cracker with a buttered marshmallow and toast in the oven, and there you have it. In 1913, someone finally thought to add chocolate, and the idea took off. The name “S’mores” (or “Some More”) first showed up in a Girl Scout handbook in 1927.
Believe it or not, Ranch dressing was actually invented on a ranch – in California in 1954, to be exact. The inventor, Steve Henson, was a plumber before he and his wife opened … wait for it … Hidden Valley Ranch.
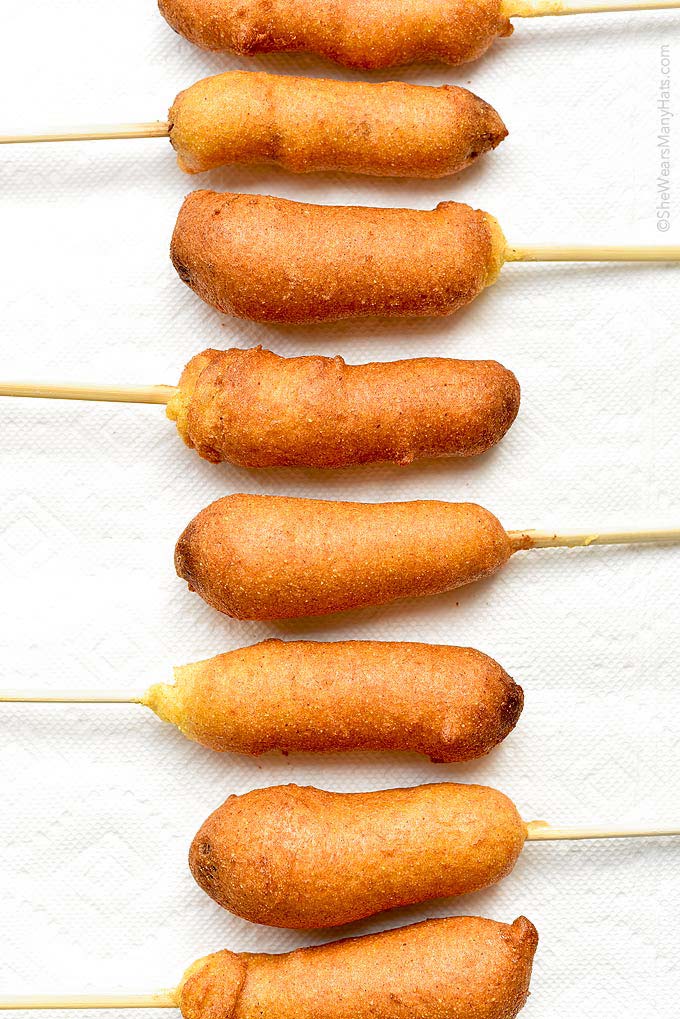
Homemade Corn Dogs
1 cup yellow cornmeal
1 cup all-purpose flour
1/4 teaspoon salt
1/8 teaspoon black pepper
1/4 cup white sugar
4 teaspoons baking powder
1 egg
1 cup milk
1 quart vegetable oil for frying
2 (16 ounce) packages beef frankfurters
16 wooden skewers
In a medium bowl, combine cornmeal, flour, salt, pepper, sugar and baking powder. Stir in eggs and milk. Preheat oil in a deep saucepan over medium heat. Insert wooden skewers into frankfurters. Roll frankfurters in batter until well coated. Fry 2 or 3 corn dogs at a time until lightly browned, about 3 minutes. Drain on paper towels.
Cold Front!
Tips from Kate’s on keepin’ it cool this summer:
It’s cooled down in the Cincinnati-Northern Kentucky area, but we all know that won’t last. Bring on your family’s favorite cold dishes, from pudding to potato salad – Here at Kate’s Catering and Personal Chef Services we have some tips and tricks for best results in keeping it cool this summer!
For dishes that are cooked and then chilled, such as some of the cold soups from last week, keep in mind that flavors are more intense when food is hot, and muted at colder temperatures. Season a bit more heavily when the food is hot, and then taste and adjust after it has mellowed in the fridge. Sauces, soups and other liquids are thinnest when hot and thicken as they cool.
For fast cooling, use an ice bath: take a larger container, like a roasting pan, fill it with ice and water, and then place the pot with your food inside. Ice and water together cool faster than ice alone. You can also seal the food inside a plastic bag and immerse it in the ice bath.
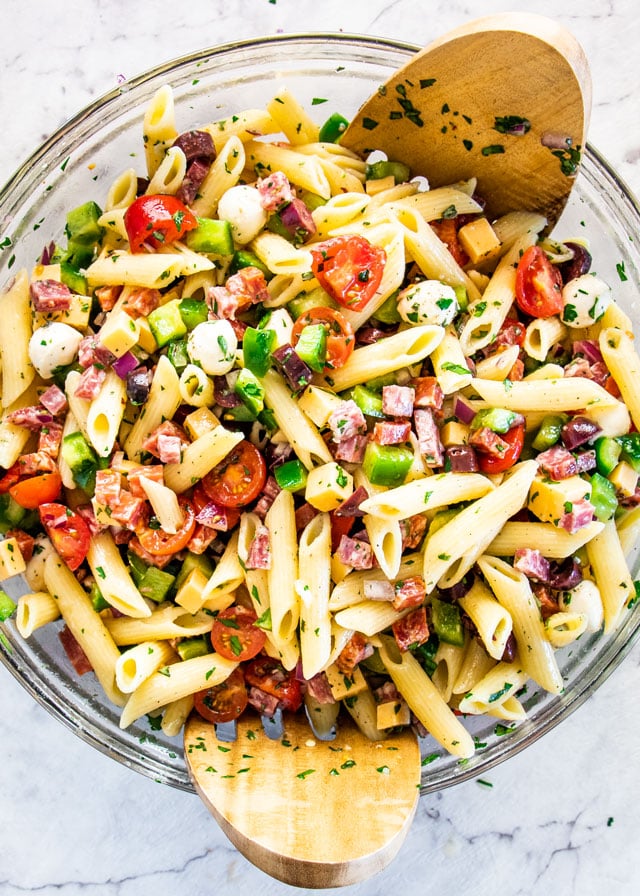
For pasta and potato salads – or any other starchy ingredient you might imagine – cook the main ingredient slightly al dente, so it still has some bite. (Refresher: an Italian term that literally means “to the tooth.”) Whatever dressing you use will soak into the pasta as the salad sits, which could make it soggy. And don’t rinse your pasta. You’ll wash off all the starchiness that the dressing sticks to. How to keep the pasta from sticking to every other piece in the bowl? Toss it with a bit of olive oil first.
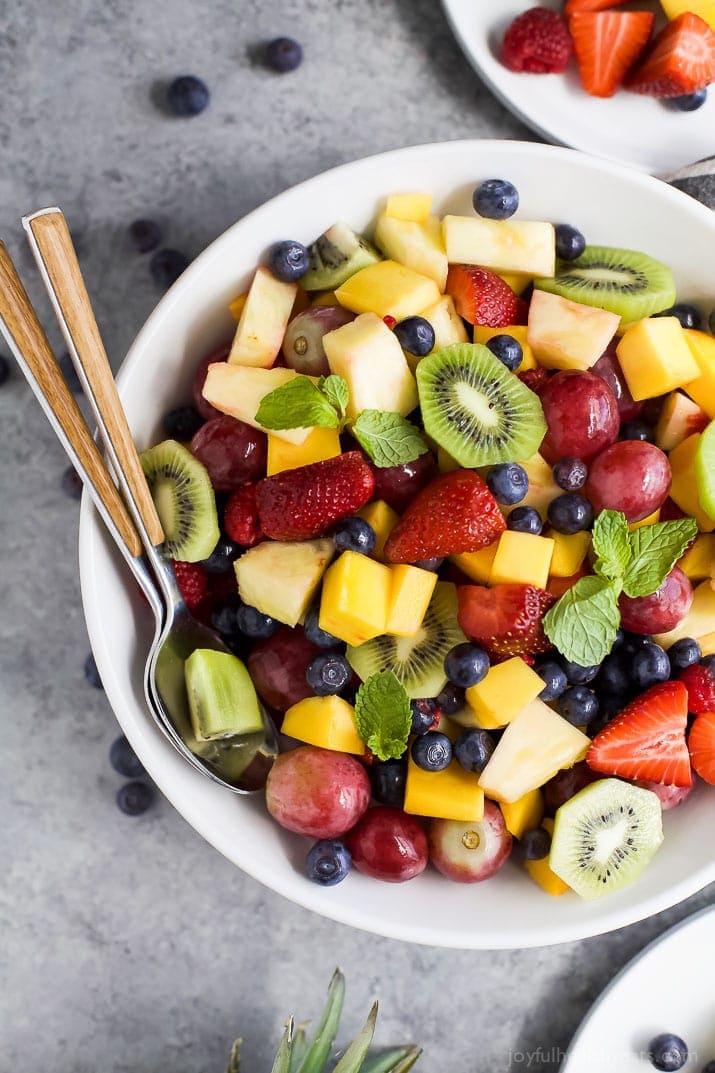
Summer Fruit Salad
2/3 cup fresh orange juice
1/3 cup fresh lemon juice
1/3 cup packed brown sugar
1/2 teaspoon grated orange zest
1/2 teaspoon grated lemon zest
1 teaspoon vanilla extract
2 cups cubed fresh pineapple
2 cups strawberries, hulled and sliced
3 kiwi fruit, peeled and sliced
3 bananas, sliced
2 oranges, peeled and sectioned
1 cup seedless grapes
2 cups blueberries
Bring orange juice, lemon juice, brown sugar, orange zest, and lemon zest to a boil in a saucepan over medium-high heat. Reduce heat to medium-low, and simmer until slightly thickened, about 5 minutes. Remove from heat, and stir in vanilla extract. Set aside to cool.
Layer the fruit in a large, clear glass bowl in this order: pineapple, strawberries, kiwi fruit, bananas, oranges, grapes, and blueberries. Pour the cooled sauce over the fruit. Cover and refrigerate for 3 to 4 hours before serving.
Chill Out with Soup!
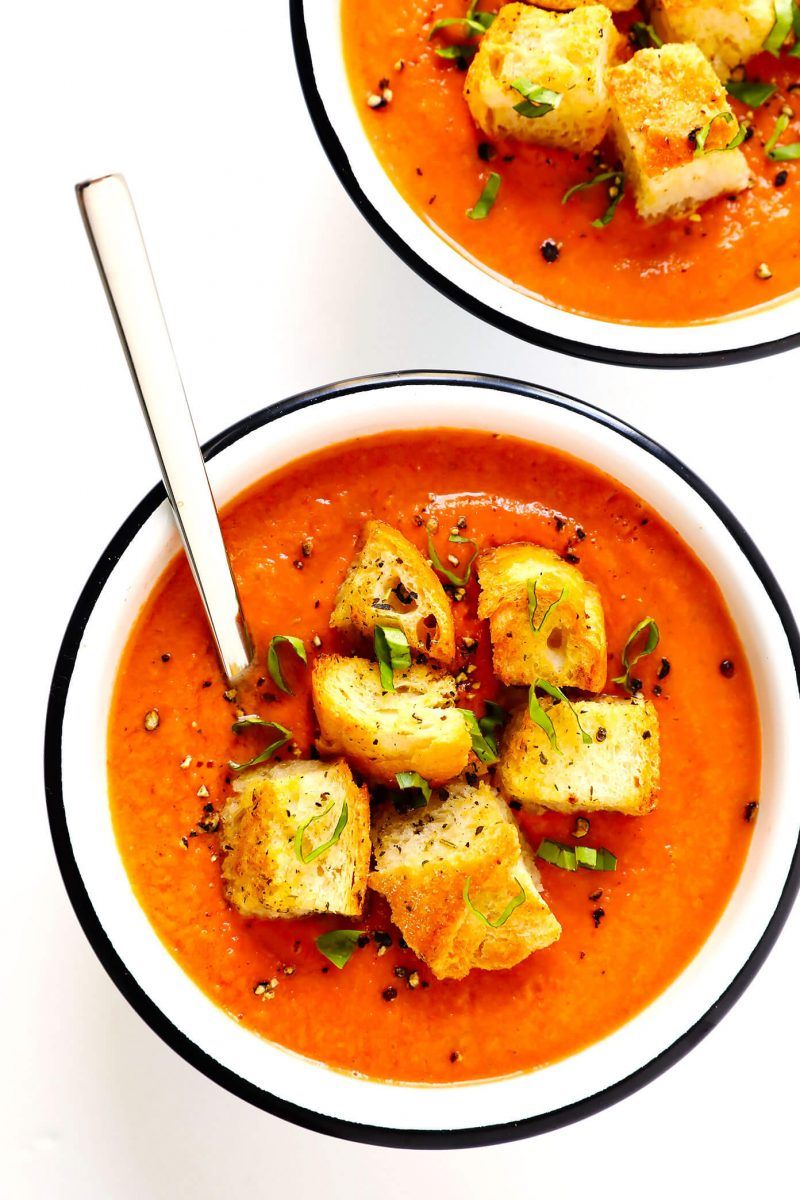
More than just Gazpacho…
Our first cold soup is mostly comprised of tomatoes and cucumbers, and comes from the southern region of Spain called Andalusia. This cold soup is made of raw, blended vegetables, traditionally including bell pepper, onion, garlic, olive oil and vinegar … but there are hundreds of modern variations. The chunkiness of gazpacho is a matter of personal taste – most people leave a little texture, but it can be blended smooth or the ingredients pulsed only briefly.
Ajo blanco is another cold Spanish soup, this one made with almonds and garlic; bread is used to thicken and make it creamier. Ajo means garlic, and blanco, of course, is white. Vegans take note – both these soups are traditionally vegan friendly.
Vichyssoise may be one of the most fun foods to pronounce: vish-ee-SWAH. This potato leek soup is cooked and pureed, then cooled down and served cold. This soup is traditionally made richer with cream and chicken stock. The name pays homage to the Vichy region of France.
Now for saltibarsciai (shalt-eh-barsh-chay). This Lithuanian soup might be familiar in another guise; it is a cold version of the beet puree soup borscht, prepared with a sour milk product – for instance, yogurt, buttermilk or sour cream. When prepared this way, the distinctive red of borscht turns a vivid magenta pink.
Watermelon Gazpacho
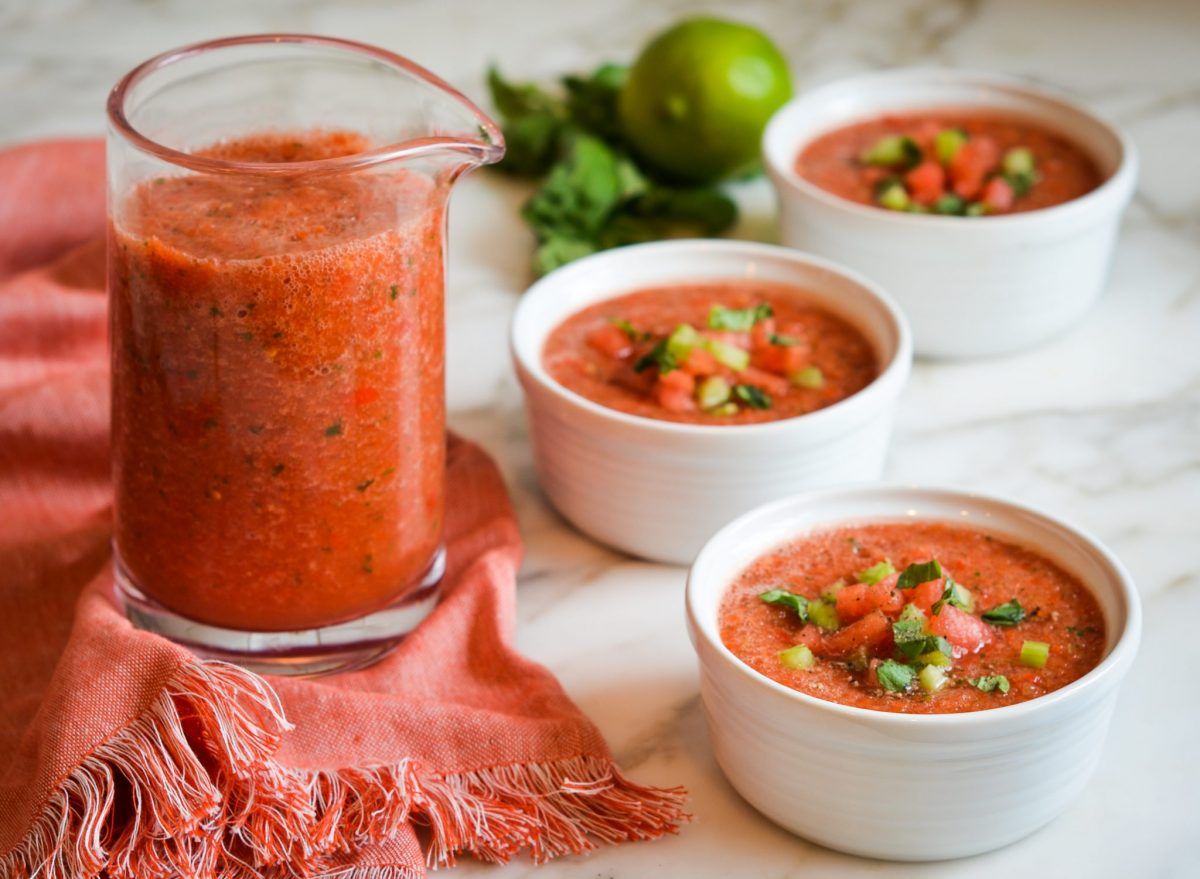
4 cups cubed watermelon, seeded, divided
2 tablespoons lime juice
1 tablespoon grated lime zest
1 teaspoon minced fresh gingerroot
1 teaspoon salt
1 cup chopped tomato
1/2 cup chopped cucumber
1/2 cup chopped green pepper
1/4 cup minced fresh cilantro
2 tablespoons chopped green onion
1 tablespoon finely chopped seeded jalapeno pepper
Puree 3 cups watermelon in a blender. Cut remaining watermelon into 1/2-inch pieces; set aside. In a large bowl, combine the watermelon puree, lime juice, lime zest, ginger and salt. Stir in the tomato, cucumber, green pepper, cilantro, onion, jalapeno and cubed watermelon. Chill until serving.
Make Way for Mirepoix!
Mirepoix (Mere-uh-pwa) is the basis for many classic dishes in France and beyond. It provides a flavorful but neutral base for almost everything!
What IS Mirepoix?
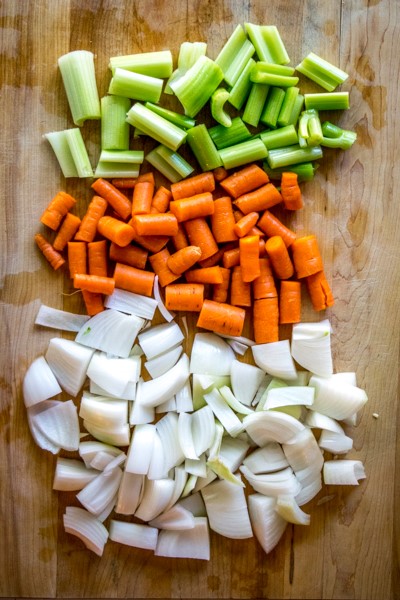
Mirepoix is a mixture of cut vegetables: half onion, a quarter carrot, and a quarter celery. If cut in large chunks, it can be used as a bed for a roast or as the base of stock; smaller pieces are great for other dishes. Why is it called mirepoix? Like many French terms, it is named after a chef’s patron, in this case the lord of the city of Mirepoix. If the color of the final dish is a concern, you might use white mirepoix, substituting leeks for the carrot.
In Cajun and Creole cooking, the “Holy Trinity” is onions, bell peppers and celery. Jambalaya, gumbo and etouffee all begin with this blend. In Chinese cuisine (and some other Asian countries), a more traditional blend is green onions, ginger and garlic. For Indian dishes, use regular onions, but keep the ginger and garlic. Italian cooks use the traditional mirepoix blend, but saute it in butter and call it soffrito. This is a bit different from sofrito (one f), a group of related Spanish / Latin American sauces made with various combinations of garlic, onion, peppers and tomatoes.
To build a dish using mirepoix, sweat the vegetables in olive oil or butter. (Sweating cooks out some of the moisture and softens the ingredients without coloring them, so don’t use too much heat.) Then, you can begin to add other ingredients. Even the simplest combinations can taste great with mirepoix to help them shine.
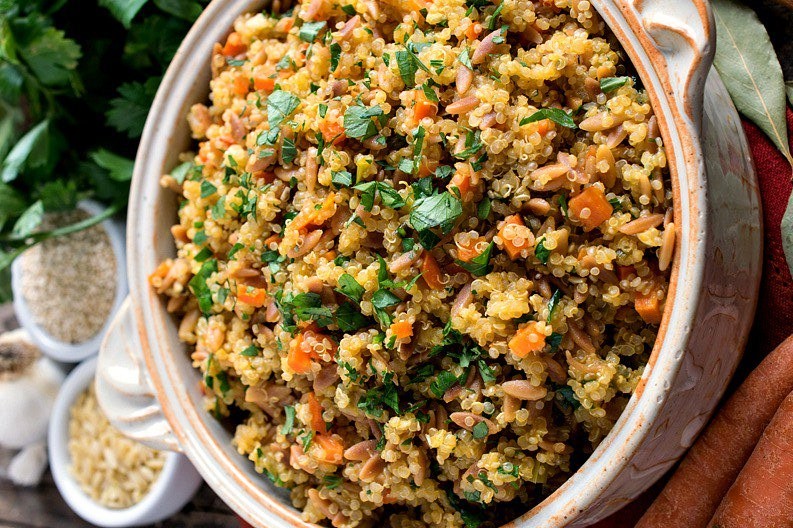
Quinoa Pilaf With Mirepoix
1 cup dry quinoa
1 tablespoon extra-virgin olive oil
1 carrot diced small
1/2 small onion diced small
1 celery stalk diced small
1 3/4 cup organic or reduced sodium vegetable broth
1/2 teaspoon dried Italian her seasoning
1 teaspoon apple cider vinegar
1/4 teaspoon salt
1/4 teaspoon freshly ground black pepper
In a medium saucepan, cover quinoa in water and allow it to soak for 5 minutes. Stir quinoa and pour into a strainer, rinse with cool water. Dry the saucepan, then heat it over medium heat and add oil. When oil begins to shimmer, add carrot, onion, and celery and cook until tender, about 4 minutes. Add quinoa and saute until the mixture emits a nutty aroma, about 1 minute. Pour in the broth and bring to a boil on high. Reduce heat to low, add Italian seasoning, cover, and cook for 20 minutes until quinoa is tender and liquid is completely absorbed. Allow to sit covered for 5 minutes and then stir in the vinegar, salt, and pepper.
Cheesecloth in Your Kitchen

Say Cheesecloth!
As the name suggests, cheesecloth – a gauzy white fabric – was originally used for making cheese, but there are plenty of other uses for the professional chef, the home cook, and everyone in between. If you examine a piece of cheesecloth, you’ll notice it isn’t solid, but instead has a myriad of tiny little holes, even smaller than those in many colanders or sieves. It is excellent for the finest of fine straining! Here at Kate’s, like many professional kitchens, we use cheesecloth to strain off the minuscule impurities found in freshly made stock.
Traditionally, cheesecloth was used to separate the curds from the liquid whey. A popular use for cheesecloth is to make a sachet. If you’ve ever made soup at home, thought you removed all the bay leaves, and realized you were wrong when you crunched down on a leaf, a sachet is a great solution. Fold up whole herbs and spices in cheesecloth and tie it off. When you’re done, just pull the sachet out.
When the holidays roll around, you can soak cheesecloth in butter and wrap it around your turkey. This helps to keep the turkey moist and infuses the skin with that buttery richness. Desserts sometimes call for a berry “coulis” (COO-lee) as a sauce, which sounds fancy, but generally, a coulis is simply cooked berries with the solids strained out. Cheesecloth is perfect for this. These same purees make great granitas, flavored lemonades, sorbets …
Where do you find cheesecloth in your grocery? Try the aisle with the cooking utensils – whisks, spoons, etc. Now that you have your own, and are a cheesecloth master, try our favorite Apple-Celery Granita recipe to test your skills!

Apple-Celery Granita
1 1/4 lb of Celery
3 medium-sized large green apples, core and seeds removed
Pinch kosher salt
1 1/2 cups simple syrup (dilution of equal parts sugar and water)
Juice of ½ lemon
In a large mixing bowl, blend the Dandy celery sticks, apple pieces and salt until a fine mash has occurred. Strain the celery and apple mixture through a fine sieve lined with cheesecloth, allow to drain for 2 hours. Add the simple syrup and lemon juice to the celery -apple mixture. To churn, follow the instructions provided by your ice cream machine for sorbet. OR! Place in a shallow dish and let freeze for about an hour. Using a fork, scrape up the surface of the mixture. Refreeze and repeat 3-4 times. Put churned mixture into a freezer safe container and freeze for at least 2 hours. Serve and enjoy!
Farro, Explained
It looks like plump, golden brown rice. Unlike rice, it maintains a chewy texture when fully cooked, and has a subtly nutty taste. It is one of the oldest cultivated grains, originating in the Middle East. In modern times, it’s most commonly found in Italy in provinces like Tuscany and Umbria. Italians like a little bite to their grains (hence “al dente” or “to the tooth”), so farro suits Italian cuisine very well. (Note that since it is wheat, farro is not gluten free. Want a gluten free alternative to rice or quinoa? Check out buckwheat, which despite the name, has no relation to wheat at all!)
Why is farro good for you? As mentioned before, whole grains are easier to digest. It is an excellent source of protein, iron, fiber and is just about fat free. It also contains a lot of nutrients like magnesium and B vitamins.

New Year, New Spices
Start the new year off right with a refreshing look at your spice drawer. When cleaning up your inventory, it’s easy to miss those little jars of spices. Expired spices won’t harm you, but they won’t do you much good, either: dried-out, dull spices add little if any flavor to your food. Do a sniff test. If you can still smell the spice (and can tell what it is without peaking at the label), then it’s still good. A rule of thumb is ground spices and dried leaf herbs (for example, oregano) last about a year; whole spices may last up to two years or more.
For an extra hit of flavor, grind your spices fresh. You can use a coffee grinder or even a mortar and pestle. Spices like nutmeg can be “ground” with a microplane (most folks would call it a zester). Freshly ground spices will always have more power than pre-bought ground spices. As far as the care and feeding of your spices, store them in a cool, dry place. Airtight jars keep out moisture and oxygen, which will affect the strength of your spices.
1.3.2019
